Post by Feezy F Baby on Dec 9, 2004 4:20:05 GMT
okay download this brush:
Brush Credit: Reality-Blurred.net
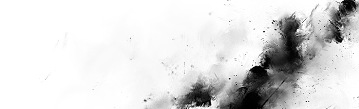
you will need this pic:

okay open a new file 500x500 and copy the pic ^^^and paste it in to the new image(u can change the color of the background if u want to) and pick the brush the first one of your new brush the one that looks similar to this one:

and then choose 455 as the size and place the brush like this:

and press it 9 times then open a new layer 500x500 and press ctrl+A one the pic of the background and the brush painted on it and after u see like a dotted line surrounding the pic, u press ctrl+c and go to the new layer and press ctrl+v and then go to Edit, Transform, Flip Horizontal and the press ctrl+a and u will see the dotted line, then press ctrl+c and the go to the previous image(the first one u made) and then press crtl+v and the choose the rectangle marquee tool:

and the set the feather to 15 px

and then select this half:

and press the delete button until the pic looks exactlly like this:

then just go crazy on the pic with the new brush...go fast but not too fast and kinda slow but not to slow...
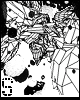
then i guess u will get somethin' like this...

wat do u all think? btw...my 1st tutorial
Brush Credit: Reality-Blurred.net
PART I:
1) Right-click on the link of the brush you want to download. Choose "Save target as..." from the pop-up menu and save the file somewhere on your computer (e.g. desktop).
2) Now go and find the file you just downloaded. If the file extension is '.abr' (like in the picture below), jump right into section 4.

If it's '.zip' (like in the picture below), go to section 3.

If you can't see the file extension, right-click on the file and choose "Preferences". There you'll find out the file type.
3)Let's unzip the package. You need to have WinZip installed (you can get it from http://www.winzip.com). Right-click the file and choose "WinZip -> Extract to here" and the .abr file appears onto your desktop (or wherever the zip file is).
4) When you have the .abr file, select it with your mouse and cut it (ctrl-x). Now browse into the Photoshop's Presets\Brushes folder (usually in C:\Program Files\Adobe\Photoshop 7.0\Presets\Brushes). Obviously if you have Photoshop CS they will be found under the 'Photoshop CS' folder (C:\Program Files\Adobe\Photoshop CS\Presets\Brushes). Paste (ctrl-v) the file into the Brushes folder.
1) Right-click on the link of the brush you want to download. Choose "Save target as..." from the pop-up menu and save the file somewhere on your computer (e.g. desktop).
2) Now go and find the file you just downloaded. If the file extension is '.abr' (like in the picture below), jump right into section 4.
If it's '.zip' (like in the picture below), go to section 3.
If you can't see the file extension, right-click on the file and choose "Preferences". There you'll find out the file type.
3)Let's unzip the package. You need to have WinZip installed (you can get it from http://www.winzip.com). Right-click the file and choose "WinZip -> Extract to here" and the .abr file appears onto your desktop (or wherever the zip file is).
4) When you have the .abr file, select it with your mouse and cut it (ctrl-x). Now browse into the Photoshop's Presets\Brushes folder (usually in C:\Program Files\Adobe\Photoshop 7.0\Presets\Brushes). Obviously if you have Photoshop CS they will be found under the 'Photoshop CS' folder (C:\Program Files\Adobe\Photoshop CS\Presets\Brushes). Paste (ctrl-v) the file into the Brushes folder.
you will need this pic:
okay open a new file 500x500 and copy the pic ^^^and paste it in to the new image(u can change the color of the background if u want to) and pick the brush the first one of your new brush the one that looks similar to this one:
and then choose 455 as the size and place the brush like this:
and press it 9 times then open a new layer 500x500 and press ctrl+A one the pic of the background and the brush painted on it and after u see like a dotted line surrounding the pic, u press ctrl+c and go to the new layer and press ctrl+v and then go to Edit, Transform, Flip Horizontal and the press ctrl+a and u will see the dotted line, then press ctrl+c and the go to the previous image(the first one u made) and then press crtl+v and the choose the rectangle marquee tool:
and the set the feather to 15 px
and then select this half:
and press the delete button until the pic looks exactlly like this:
then just go crazy on the pic with the new brush...go fast but not too fast and kinda slow but not to slow...
then i guess u will get somethin' like this...
wat do u all think? btw...my 1st tutorial

 (Cool brush too!
  )
)